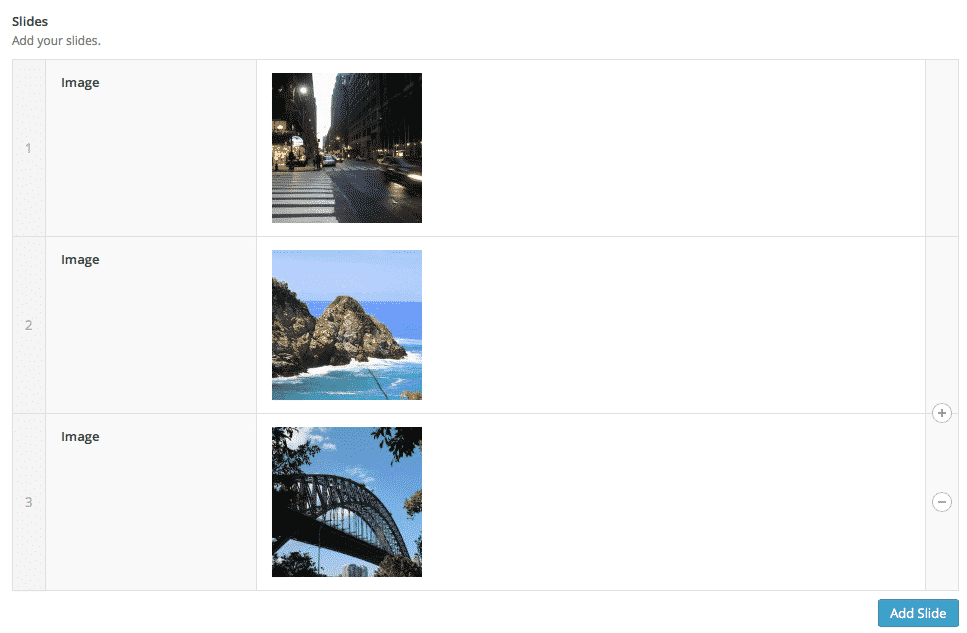
To get started with this tutorial, you should be running a copy of Advanced Custom Fields Pro because it includes the Repeater field, which is what we will be using to generate the individual slides.
Also, for this tutorial, I will be showing you code that is specific to the Genesis Framework so if you are running a non-Genesis theme, you will need to include the code within your theme’s templates. I’ll point this out when we get to that point.
Let’s dive in!
Configure Advanced Custom Fields
Let’s first get Advanced Custom Fields set up to create the slides. Begin by installing and activating Advanced Custom Fields Pro. Once ACF is activated, head over to the settings and create a new field group called “Image Slider” or whatever you want to call it.
Next, we need to set up the fields for the slides. For this tutorial, I’ll be showing you how to create a very basic image slider so, for now, we only need to use image fields. However, you can get creative and add whatever content you wish.
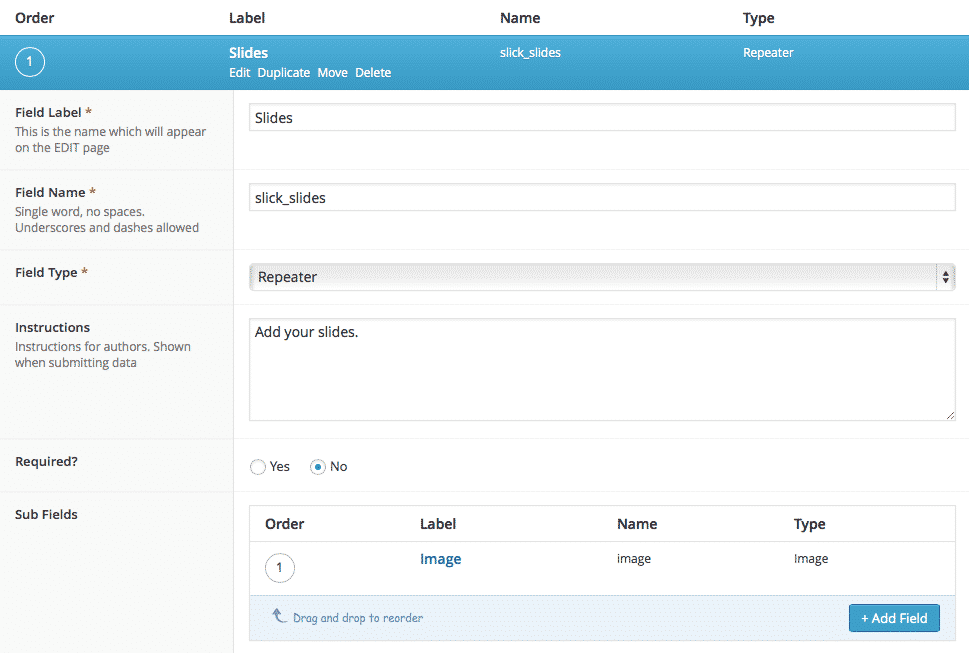
Since there can be any number of slides in the slider, we will need to begin by adding a Repeater field to our field group. This will allow you to add repeatable sections that will be used for each slide. In the code I’ve included in this tutorial, I’ll be running a query of these sections using slick_slides as the key for this repeater group. You can use the same or change it but, if you change it, make sure to change it in the code.
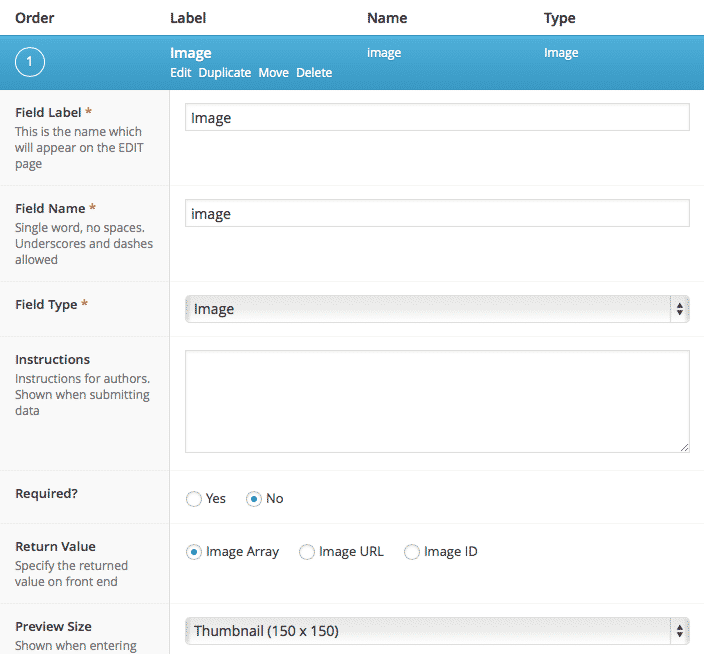
Once you have the repeater field in place, add an image field within it. For this field, I’ve used the key image. To stay in line with my code below, this field should be set to return the image array. All of the other settings can remain as the default so save your changes and let’s move on.
Assuming you’ve added the fields to the post types of your choice, go an create a new post with a slider to use as an example and to confirm everything is working.
Add the “Slick” jQuery Plugin
Next, it’s time to add Slick, which is an awesome jQuery plugin for creating sliders of any type. To do this, add the following to your functions.php file:
Sign up or log in to view code
View CodeWhat this is doing is adding Slick’s Javascript and CSS files from the CDN on which Slick is hosted (if you prefer to include local copies, you can download them from the Slick website). It’s also including the Slick configuration file, which we need to create next.
Configure Slick
Slick has a number of settings that will allow you to configure your sliders in different ways. To get Slick running, we need to instantiate it and, optionally, give it some settings. Paste the following jQuery into a file called slick-init.js and upload it to your theme’s “js” directory.
Sign up or log in to view code
View CodeThis code is applying Slick to any element with the class of slick-slider, which you’ll read more about next. It also sets a few basic settings to show you the general concept. You can edit/remove these settings or add your own.
Slider Markup
Finally, we need to output the slider. As I mentioned before, I will be showing code that is specific to the Genesis Framework, my theme of choice. However, the only part that you need to attend to is the add_action( 'genesis_after_content', 'rv_output_slick_slider' );. Since this is outputting the slider in an example location, you can simply remove the code within the function rv_output_slick_slider() function and place it within your theme files to output the slider wherever you want. However, if you want to use the slider within the post content, you’ll need to do something like register a shortcode so that it can be inserted within the editor.
Sign up or log in to view code
View CodeTo finish up, I added a bit of CSS to style a couple things and you’ll likely want to as well. Here’s my basic CSS:
.slick-slider .slide,
.slick-slider .slide img {
	width: 100%;
	height: 400px;
}

.slick-slider p:hover {
	cursor: pointer;
}

.slick-slider .left-arrow {
	text-align: left;
}

.slick-slider .right-arrow {
	text-align: right;
}
The End
There you have it, a simple image slider using Advanced Custom Fields and Slick. I may eventually write a new tutorial on more advanced usage but, for now, enjoy this one!


Thanks a lot, works very well for me in a custom posttype/custom fields project with Genesis/Dynamik.
Peter Luit
The Netherlands
hey
I want to add dots in this slider and i add this code
dots: true,
in jquery file but its not working what i have to do?
That should be all you have to do. Without seeing your code, though, I can’t say for sure.
Hi Ren,
Is it possible to make it into a carousel with open in lightbox?
If so, how?
Hi, Torkild. It’s definitely possible, but it would require further customizations to the code.
Hi Ren,
Working on a site for a client so just recently got to know about this.
Great plugin and I’m looking forward to the more advanced tutorial.
One question, will it support for more than one slider on the same page, with different settings?
e.g one with fade transition and the other with slide transition.
Cheers
Hi, Torkild. Yes, you can include multiple sliders on the same page. To do it, you’d simply add the second slider’s markup, make sure to give it a different identifier (ID or class) since it will have separate Slick options, then configure the options for it.
Brilliant,
Thank you!!
Sure thing!
Thanks, Ren!
This is one slick plugin ;), and it feels so much cooler to play with the jQuery and PHP myself – instead of installing a plugin from the WP repository. Although I like webvitaly’s Anti-Spam plugin a great deal… this slider of his looks pretty sweet, too: https://wordpress.org/plugins/magic-slider.
Great guide you got here – looking forward to more!
Hey, Sean. Glad you liked it!
Thank you. Awesome!
Thanks for this tutorial. I think your post would’ve been even better if there was a demo link to the slider or at-least an image of the finished slider.
Thanks for the idea, Aksam. That is a good idea and I’ll make a note of it. I’m glad you liked the post!
Dude, dope tutorial! Just what I was looking for. One addition, I wanted to get a specific image size, so on top of your code, I edited line 21 in your slider markup to:
$image_url = $image['sizes']['large'];
Awesome again. Thanks!
Thanks for sharing, Kenny!