WP Pusher Plugin
A common workflow among developers, in a nutshell, is developing WordPress plugins and themes locally and pushing their projects to a GitHub (or similar service) repository. Once pushed to the GitHub repo, the developer can sync it up with a live WordPress installation (i.e. a client site) through various methods. WP Pusher is one of those methods and I’m going to explain how it works and why you should check it out.
I recently learned about WP Pusher when the plugin’s Twitter account followed me (I’m very glad it did). WP Pusher, written by developer Peter Suhm, is simply awesome! For this review, Peter was kind enough to provide a a copy of the plugin and a license key so big thanks to him!
Ease of Use
I am no Git(Hub) expert so I’m the kind of user who wants to be able to sync my repositories with live sites as simply as possible. The WP Pusher admin is as simple as can be and Peter has documented it to answer any questions you might have when setting it up. Let’s walk through the set-up process. As a note, I’ll be showing you how WP Pusher works with GitHub but it also supports Bitbucket and GitLab.
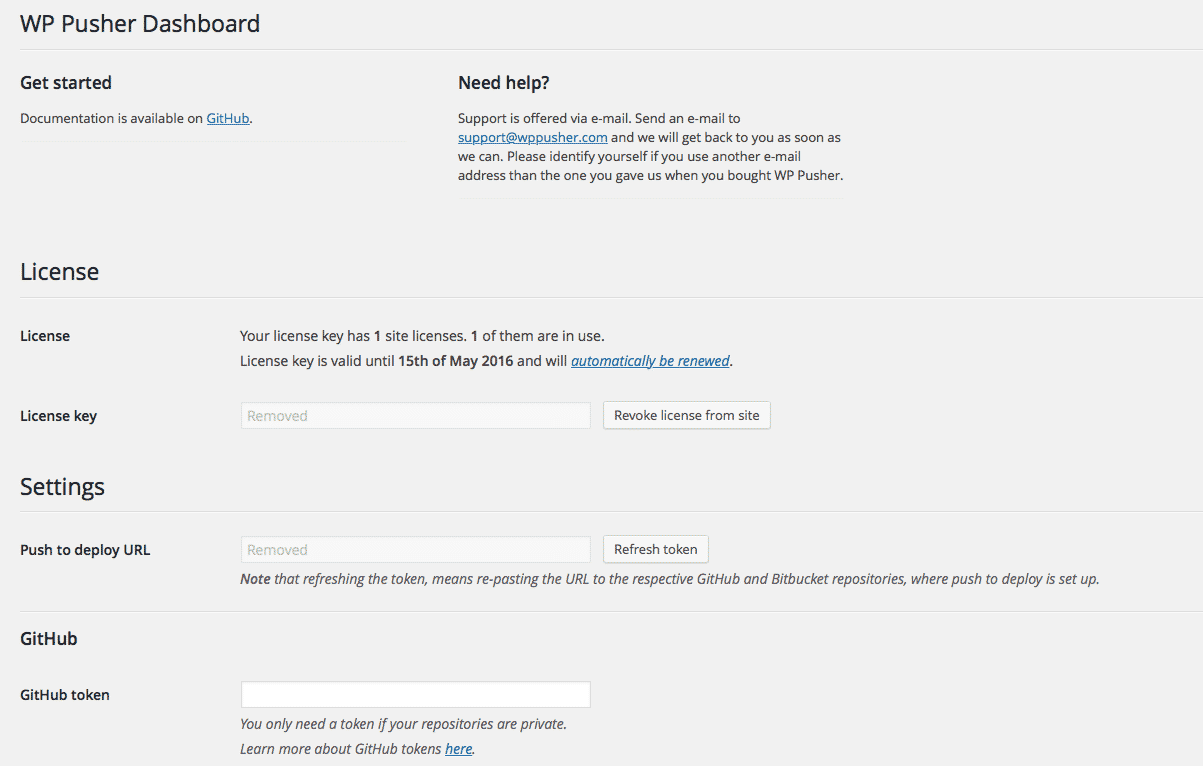
First up, after installing and activating WP Pusher, you need to configure the settings. There’s just one or two, depending on your needs: 1) activate your license key, 2) insert your access token if needed (only when working with private repositories).
A “Push to Deploy URL” will also be generated so copy this because you need it for the next step.
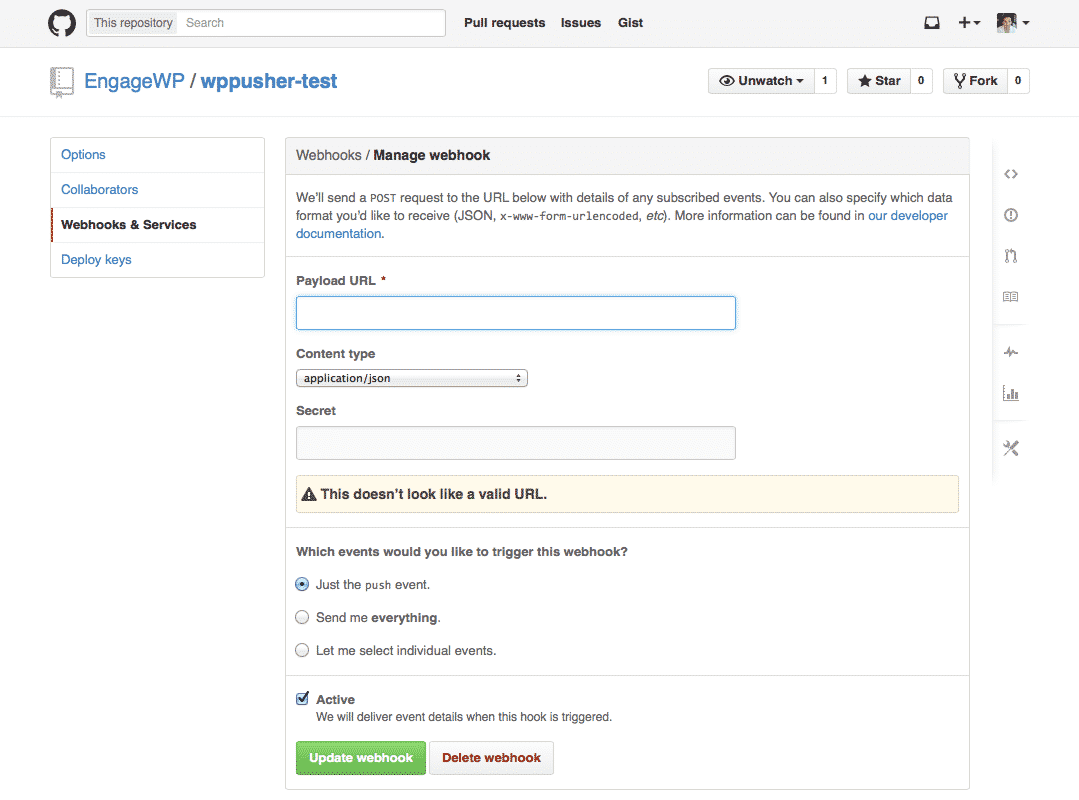
The “Push to Deploy” feature is very slick and my favorite feature of WP Pusher. This automatically updates your WordPress plugins and themes as soon as you push your commits to GitHub. When you push your changes, GitHub sends a POST HTTP request (containing the JSON-formatted changes) to the “Push to Deploy URL” and WP Pusher updates the plugin or theme with the updated repository. This is made possible by the GitHub Webhooks so you need to add one to your repository. From your repo’s page, navigate to Settings → Webhooks & Services → Add Webhook. Paste the “Push to Deploy URL” into the “Payload URL” field and save the changes (everything else remains on default). GitHub will ping the URL to ensure that the connection is made. You can verify it by checking the “Recent Deliveries” section of the newly-created webhook’s edit page.
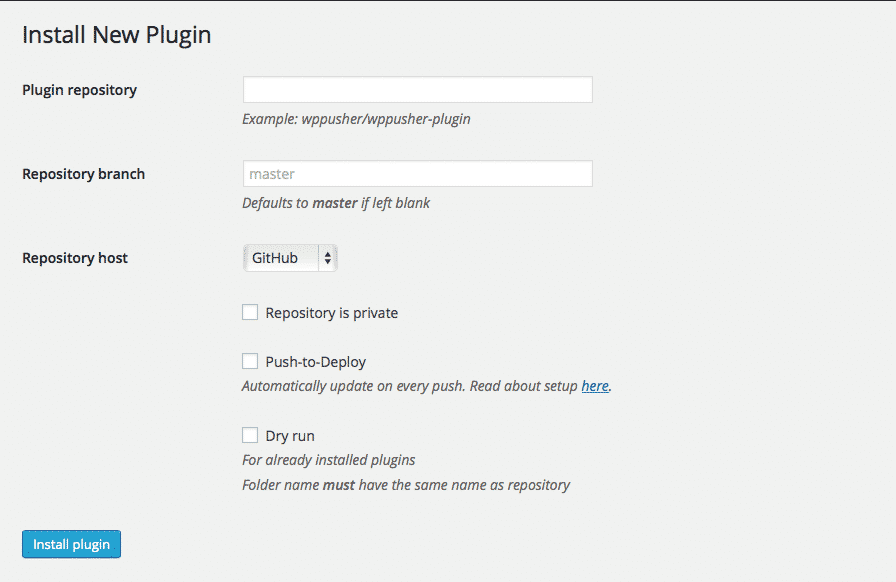
Finally, you need to add your plugin or theme to your WordPress website and link it to the GitHub repository. This can be done like normal or by using WP Pusher. I created a simple plugin for testing, uploaded it to GitHub and added it to my site via WP Pusher. The steps for adding your project are very simple so go through them and you’ll be ready to roll in just a few seconds.
Once running, I pushed some changes to the GitHub repo and checked back on the site…BOOM! Everything worked perfectly and my plugin was current with the GitHub repo.
Why You Should Use WP Pusher
With the auto-sync between a GitHub repository and WordPress, why wouldn’t you want to use WP Pusher? This kind of feature allows me to work on my client sites, this blog or any other live website and enjoy the luxury of having all my important plugins and themes on GitHub where I can access them at anytime, from anywhere. With the auto-sync, I can push changes to GitHub and update a live site in one swipe (no real need for FTP/SSH).
Get WP Pusher
WP Pusher has a few pricing options. You can download a free copy, which supports unlimited public repositories but no private repos. From there, you can spend $39, $99 or $199 per year for a 1-site, 5-site or 20-site license, respectively. My only wish was that an unlimited license was available (wink wink @ Peter).
WP Pusher is one of those plugins that genuinely makes life easier for developers and is one I believe to be a solid addition to any developer’s collection. Go show your support for such an amazing product and grab a license!


If your site is indeed ready to push live, make sure you make a copy of all your files within it to keep a backup handy. For good measure it is also wise to backup your database used when you installed WordPress locally.