This is a guest post by Wladimir who’s the Director of Biz Dev at WPMU DEV, the creators of the Forminator plugin.
Generating leads is an important part of growing your business. However, WordPress lacks any in-built lead generation features or functionalities. But nothing to fear, just by using a powerful form builder plugin and with some basic lead capture know-how, all that can be easily changed. And so, for the purpose of this read, we have a step-by-step guide on setting up lead generation forms in WordPress.
Now, the first thing you will need is a form builder plugin. We will be using the Forminator plugin for the tutorial. The reason behind using this plugin is that it packs tons of awesome features and customization options which will help you create a unique and personalized lead generation form.
So without further ado, let’s get started with our Step-By-Step Guide On Setting Up Lead Generation Forms In WordPress:
Step 1: Installing The Plugin
Installing the plugin is similar to how you install any other WordPress plugin.
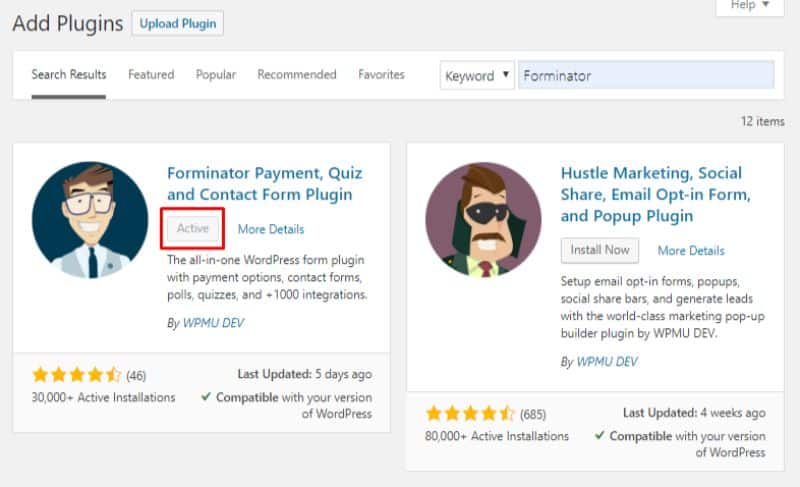
First head on over to your WordPress dashboard > Plugins > Add New. Now, type in Forminator in the search bar. Now as shown in the image below, click on Install followed by Activate, and the plugin will be installed on your WordPress website.
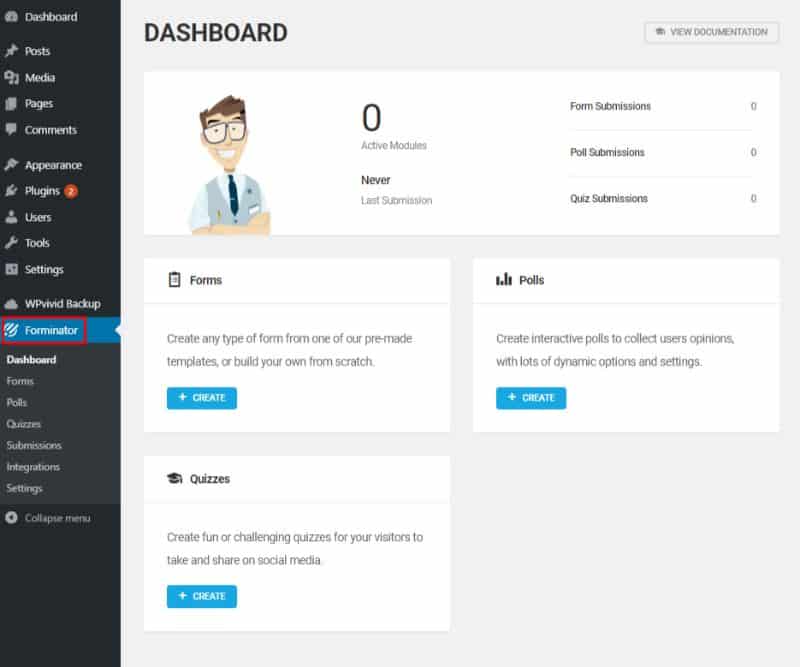
Once you have successfully installed the plugin, head on over to your WordPress dashboard. On the left side sidebar, you should notice a new option – Forminator.
Click on it to enter the main Forminator Dashboard.
Step 2: Creating A New Form
As you can see from the previous image, Forminator allows you to create rich forms, quizzes, and polls. Now, since we are interested in creating a lead generation form, we will be creating a new form with the plugin.
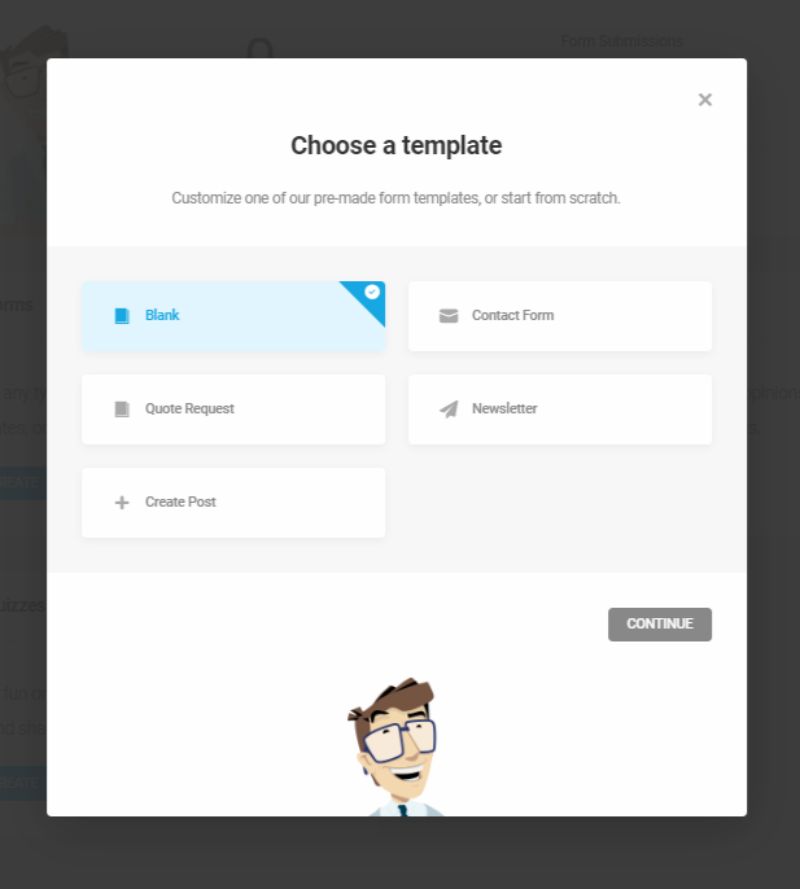
To do this, either click on the +CREATE button under Forms. The following window will pop-up on the screen.
From here you can select a default forms template already provided with the plugin or pick “Blank” if you want to create a Lead Generation Form from scratch.
Now, all these different options can help you capture leads for your website. For example, you can capture leads by offering newsletter signups where the users provide email addresses. You can do the same with the Quote Request option if you sell products or services.
However, we will be using the Newsletter template as it is the most staple and widely used means of increasing your subscriber count and generating more leads. Once you have selected a template, you need to pick a name for the form you are building. Don’t worry as it can be changed later on.
Step 3: Insert Form Fields
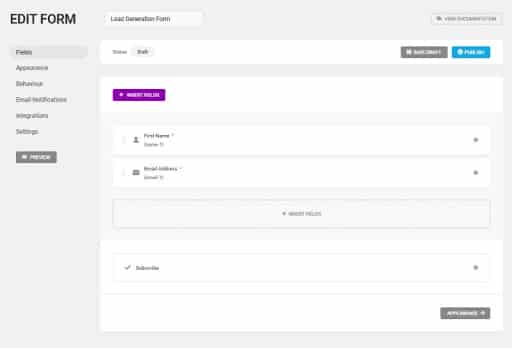
Once you have selected a Form template and given a name to your form, you will be taken to the form editor.
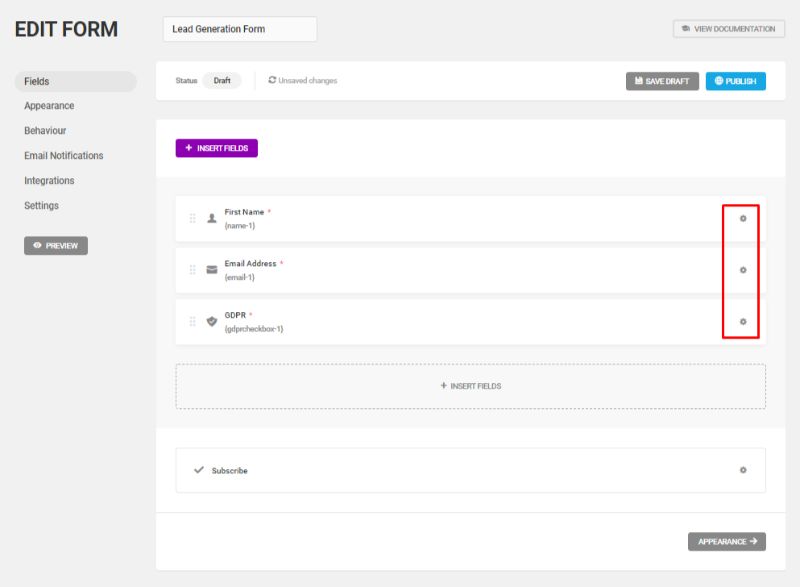
As you can see, the plugin allows you to “Insert Fields” which you can use to ask your users for additional information. Since we selected the “Contact Form” template, the following fields are already inserted into our form –
- First name
- Email Address
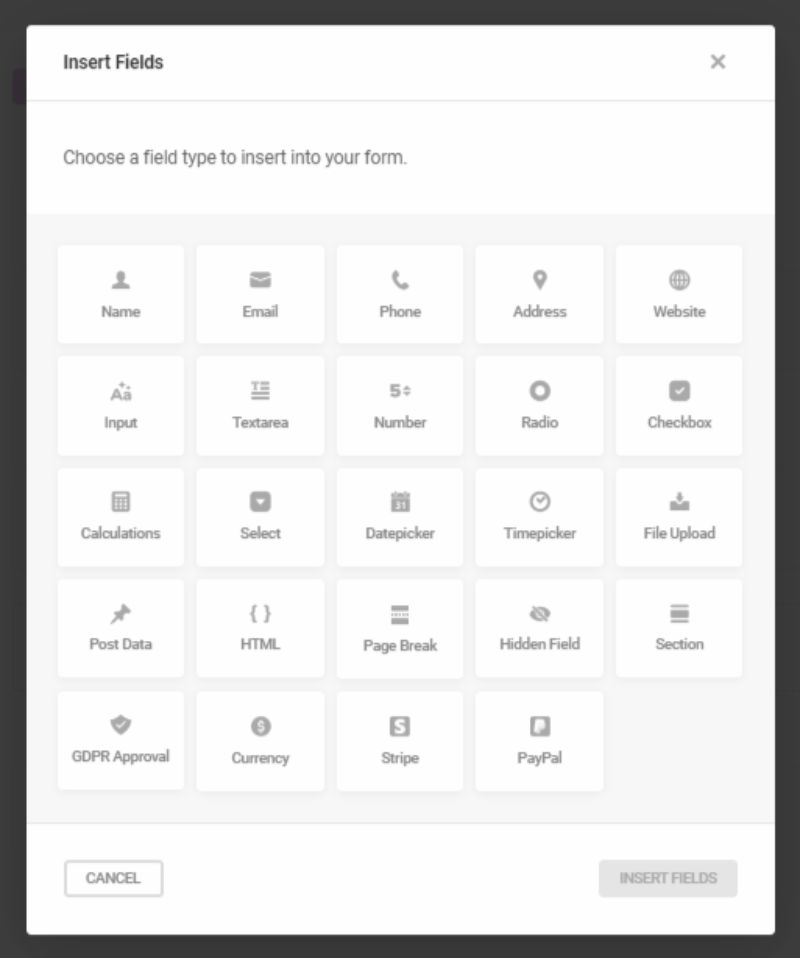
Now, you can easily change these fields or add new fields to our form. Selecting the “+Insert Fields” options gives you access to all the field options provided with the plugin.
We will be inserting a new GDPR Approval field because it has become mandatory to offer clear disclosure about data collection.
Once you are done selecting all your new Field Modules, you can start rearranging them in any order you like. The form builder also supports drag and drop gesture which makes things a whole lot easier.
Step 4: Customizing The Form Fields
Notice how each field type has a settings icon beside it. You can use it to further customize each field type.
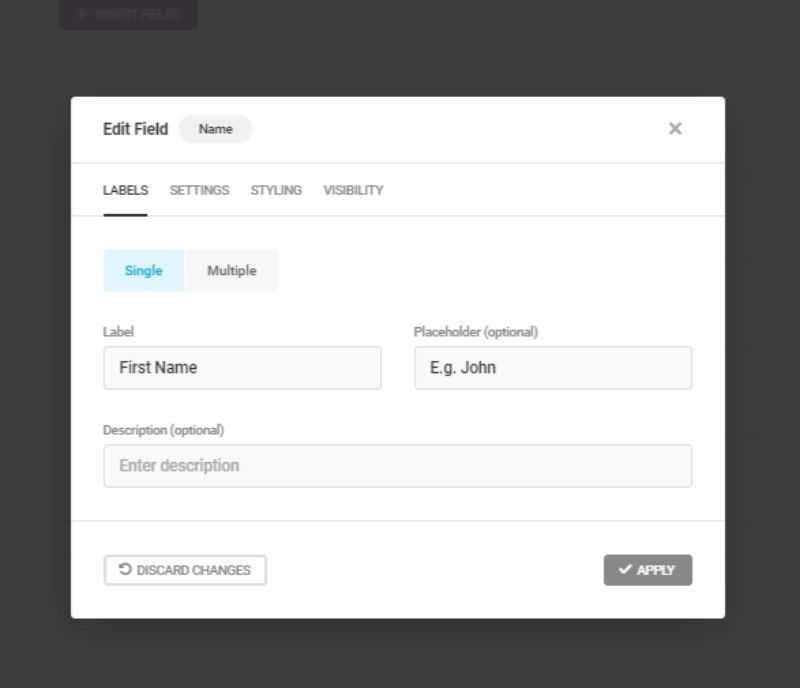
Let’s customize the Name field type.
As you can see, we are able to add a label, placeholder text, and even a description to the field type.
This is available if we pick the Single Label. However, if we head on over to the Multiple label, we will be able to add a prefix text, first name section, middle name section, and a label section, all under the single Name form field. We are also given the option to insert placeholder texts and descriptions as well.
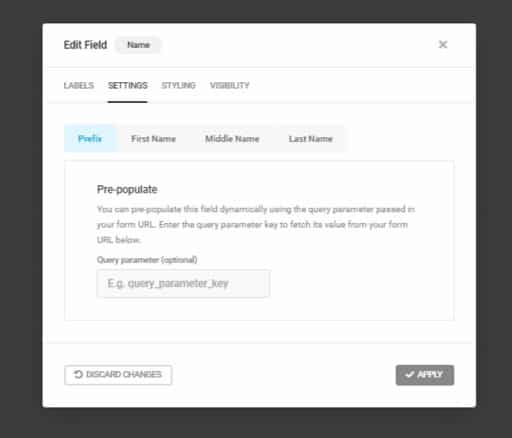
Moving on, we have the Settings tab.
For the Name Field Settings options, we have the option to add a Query_Parameter key which will automatically prepopulate the fields.
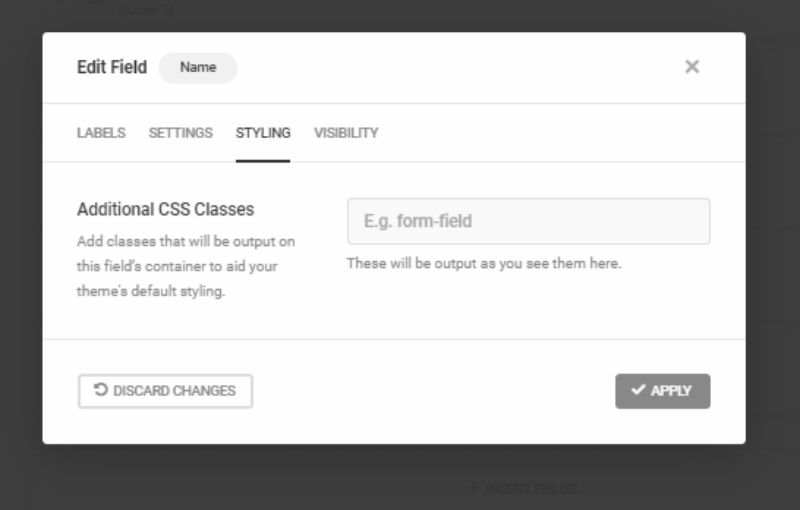
Next up, under the Styling tab, we have the option to add custom CSS to insert our own design into the mix.
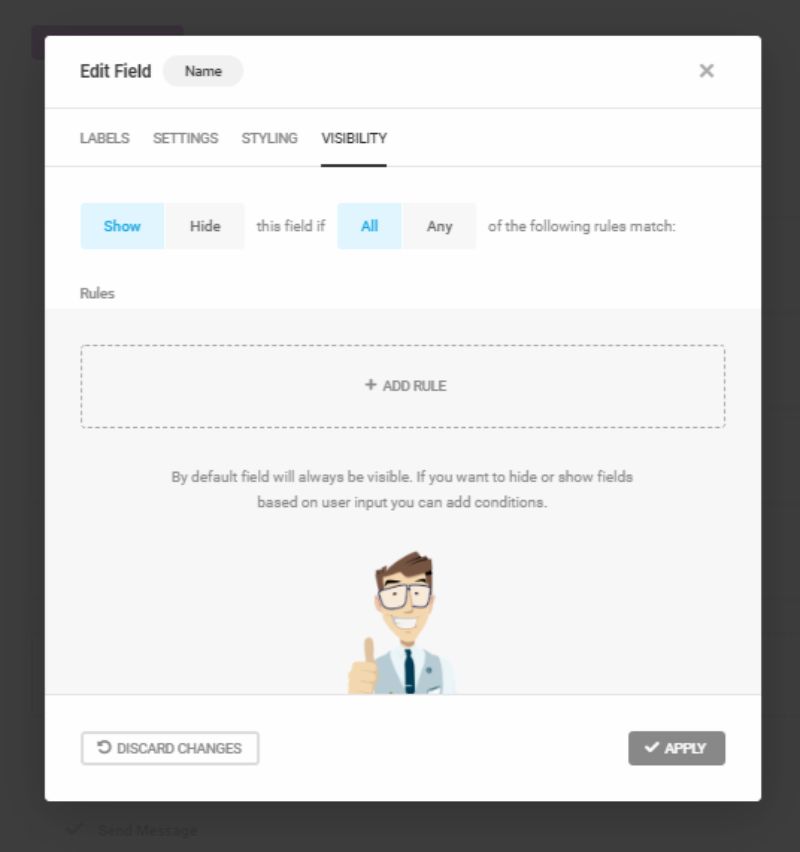
And finally, we have the visibility tab where we can add rules specifying whether we want to show or hide the field.
Now, as you can guess, depending on which field you pick to edit, you will be given different settings options.
Step 5: Adding the Final Tweaks
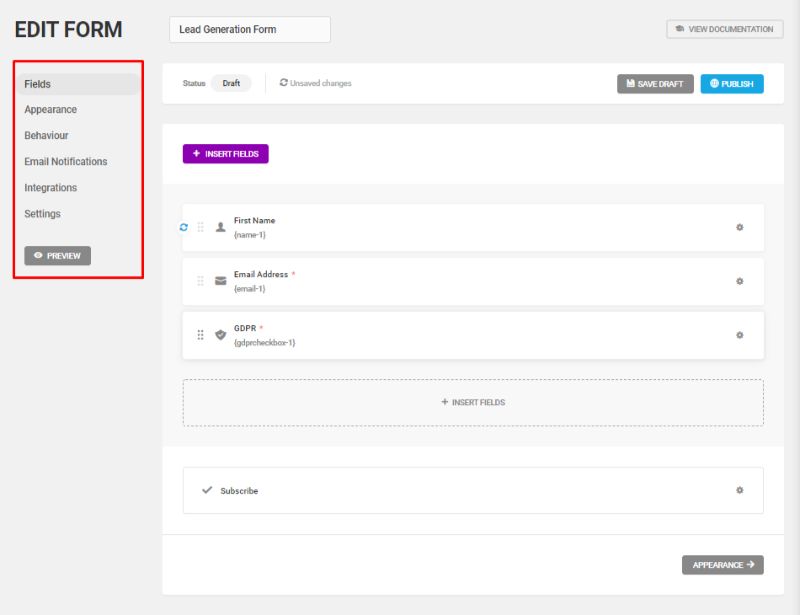
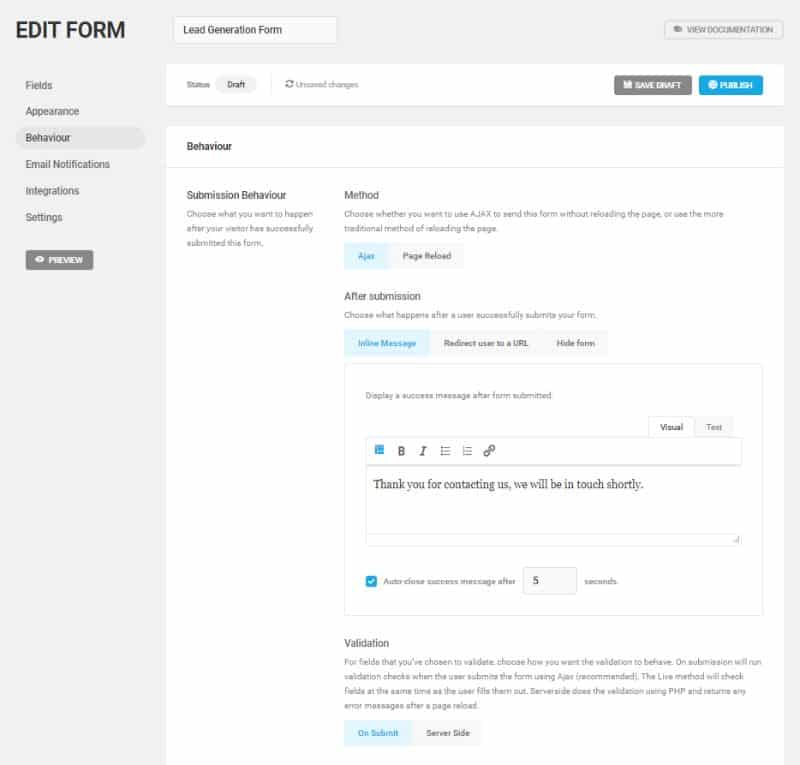
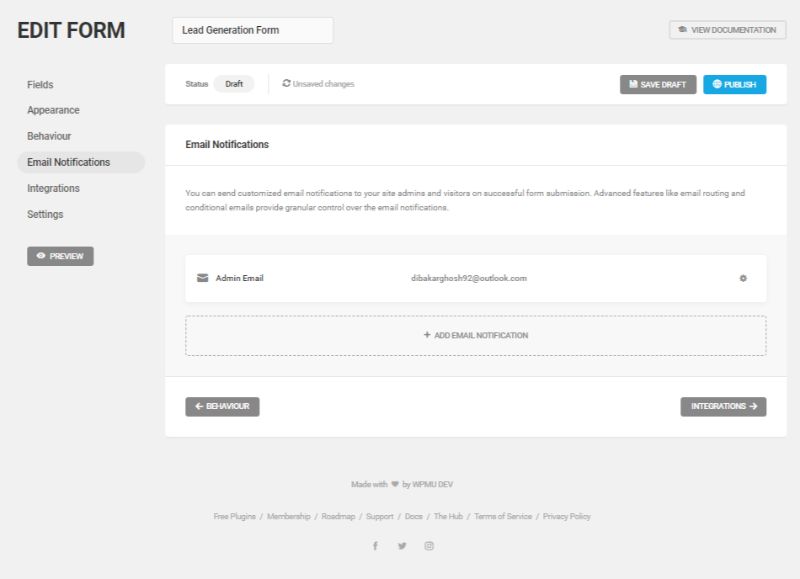
Now that the basic structure and layout of your Forminator lead generation form is complete, it’s time to add the final touches. If you take a look at the left side of the form editor, you should notice a bunch of options for Appearance, Behaviour, Email Notifications, Integrations, and Settings.
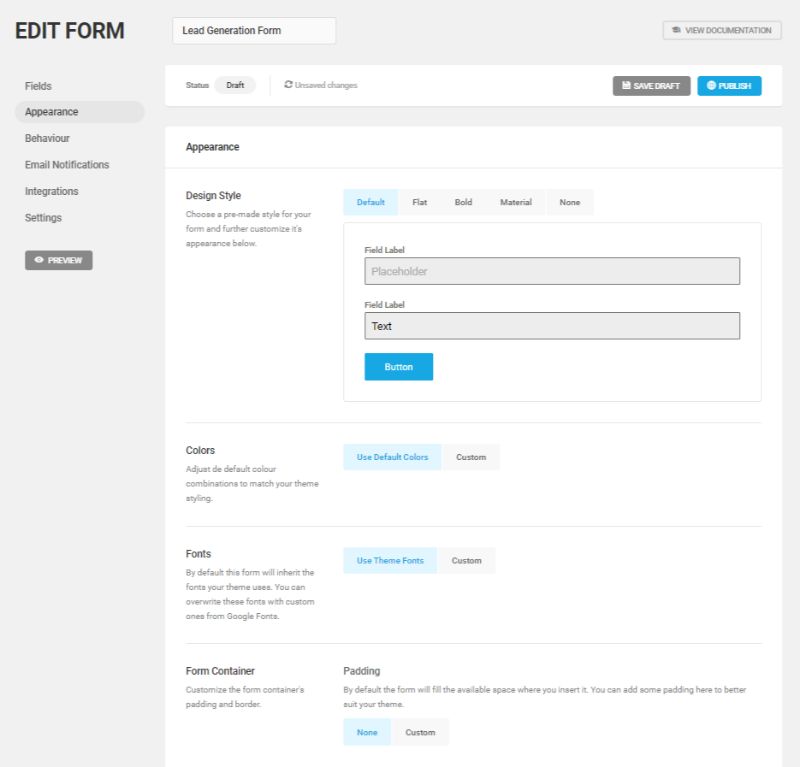
As you can imagine, under the Appearance section, you will be given options that let you configure the overall look and feel of the form.
From the Behaviour section, you will get options to tweak the submission behavior of the form.
Under Email Notifications, you can configure an email address where a notification will be sent every time a user subscribes to your newsletter.
The plugin also offers integration with tons of third-party email services as well as CRMs. Under the integrations tab, you can choose an already integrated email service or CRM to assign with your lead generation form. In that case, when a user subscribes to your newsletter, their information will be sent to the respective email service.
And finally, we have the Settings tab from where you get all the basic settings specific to the form.
Step 6: Publishing The Form
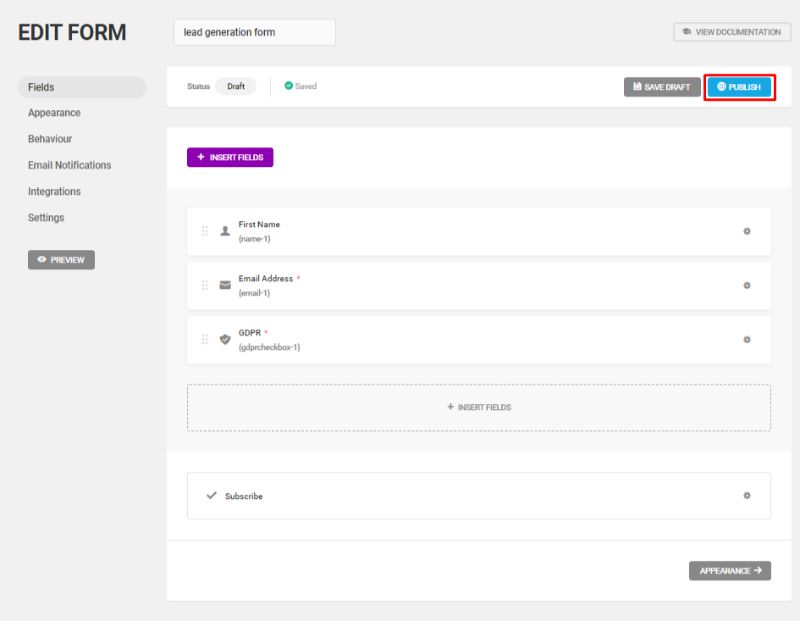
Once you are done building and customizing your lead generation form, hit the Publish button at the top right side of the form editor.
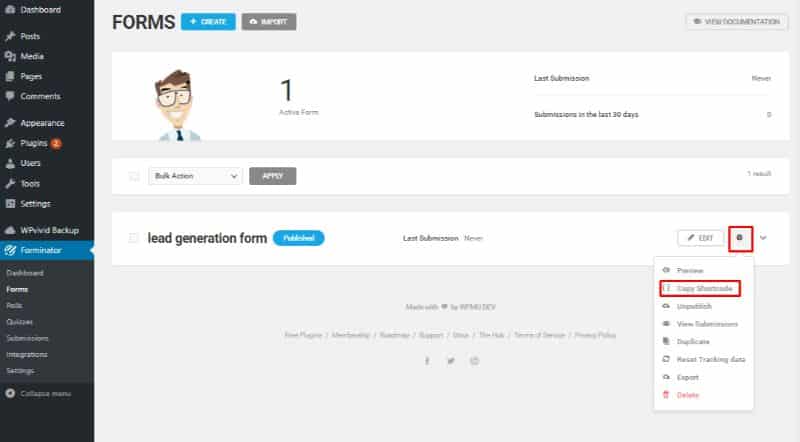
Now, your form is ready to be embedded into your website pages and post. However, to do this, you will need to use the form shortcode. To get the shortcode, head on over to the Forminator section from your WordPress Dashboard and then go to Forms, select your form, hit the settings button, and click on ‘Copy Shortcode.’
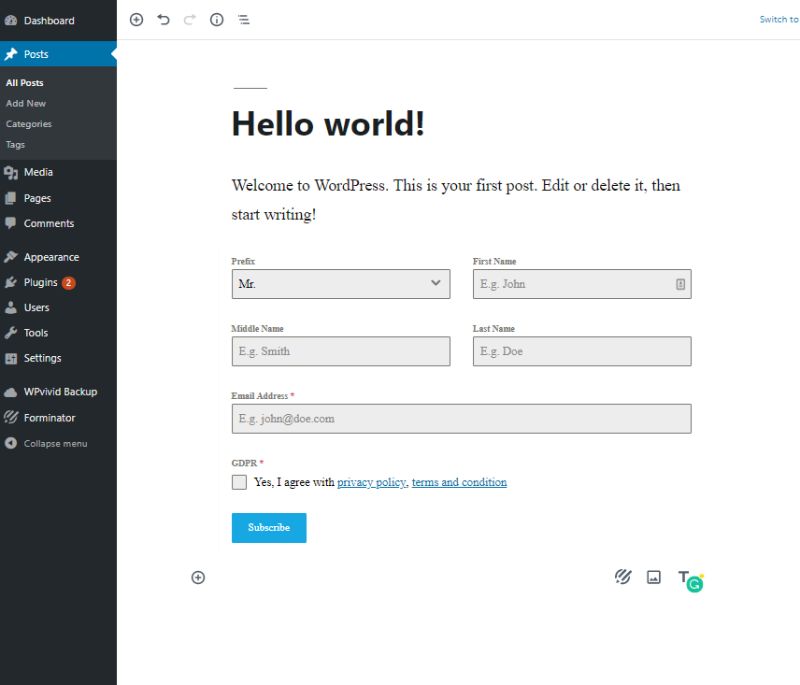
With the form shortcode in hand, head on over to the WordPress page or post where you want to embed the shortcode. Now, as you can see from the image below, as soon as we insert the shortcode into the WordPress editor, the form pops-up on screen with all our fields.
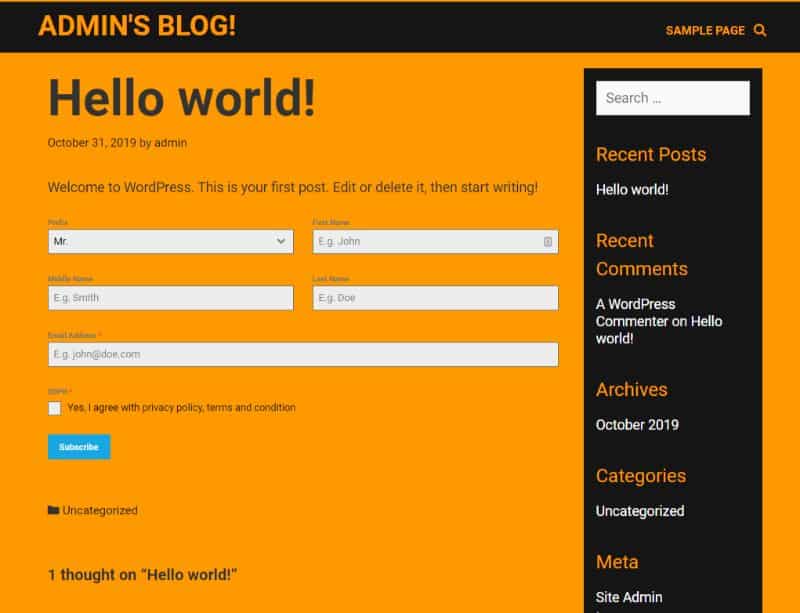
Let’s see how it looks on our website:
As you can see, by default, the form will inherit the style of the theme you have installed on your website. However, if we wanted, that too could have changed via all the customization options offered by the plugin.
And That’s It!
Congratulations – following all these steps you should have successfully created your lead generation form with Forminator. We hope you found this guide to be helpful, however, if you still have some questions or doubts, then feel free to leave a comment down below.
Leave a Reply