Thanks in part to the ubiquity of smartphone devices, floating action buttons have become a familiar design element for both websites and apps.
Put simply, floating action buttons help you drive visitors towards important information or actions you want them to take. Implemented smartly, you can use them to promote your business and create a more user-friendly website.
Buttonizer is a freemium WordPress plugin that brings the power of floating action buttons to your WordPress site. You can use it to connect with visitors via chat, drive social shares, create CTAs, and lots more.
In this hands-on Buttonizer review, I’ll take a look at this plugin and show you what it can do and how it can help your site.
Buttonizer Review: Here’s Exactly What It Does
If you’ve been scratching your head in confusion at this whole “floating action button” discussion, let’s start with a quick example of exactly what we’re talking about from the Buttonizer website.
The bottom button (the robot icon) is always present (that’s why it’s “floating”). When clicked, it expands a full list of options (those are the “actions”):
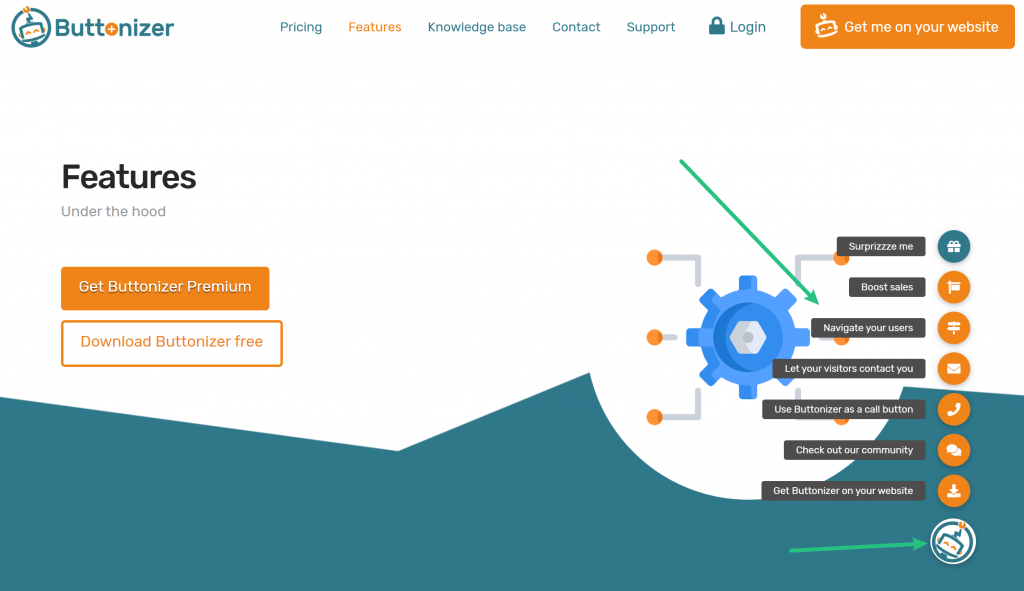
Buttonizer helps you create your own customizable set of buttons just like that. Or, you can also just create a single static button.
You can choose from 25+ different actions for your buttons including…
Perform an action:
- Visit a website URL
- Back to top of page
- Go back one page
- Copy URL to clipboard
- Print page
- Initiate a JavaScript function
Initiate a chat via…
- SMS
- Facebook Messenger
- Twitter DM
- Skype
- LINE
- Telegram
- Viber
Other contact methods…
- Phone call
Share on social media…
- Snapchat
- VKontakte
- Waze
Open a popup via your favorite popup plugin…
- Elementor Popup Builder
- Poptin
- Popup Maker
- Popups
You can use targeting rules to make sure your buttons appear at the right spot and to the right visitors:
- Device targeting. This lets you target buttons to specific devices. For example, it probably doesn’t make much sense to display a phone call button to desktop visitors.
- Page-level targeting. This lets you personalize your buttons to the content a visitor is looking at. For example, creating a special set of buttons on your pricing page.
- User role targeting. This lets you only display your buttons to users with certain WordPress roles.
- Time of day targeting. This lets you hide the button when your business isn’t open, or display a different button.
You can also add trigger rules to control when your buttons appear:
- Scroll depth
- Time on page
- Exit intent
To track which buttons get the most interest, Buttonizer can automatically set up Google Analytics Event Tracking to track clicks.
And finally, you get plenty of options to customize how the buttons look to match your site. You can switch up colors, use any Font Awesome icon, upload your own icons/images, etc.
Let’s go hands-on and I’ll show you how all this stuff works…
How to Use Buttonizer to Create Floating Action Buttons on WordPress
Once you install and activate the Buttonizer plugin, it will launch you straight into the Buttonizer interface.
The new Buttonizer interface is heavily based on the WordPress Customizer, which is great because it means you can see a real-time preview of your buttons as you configure them.
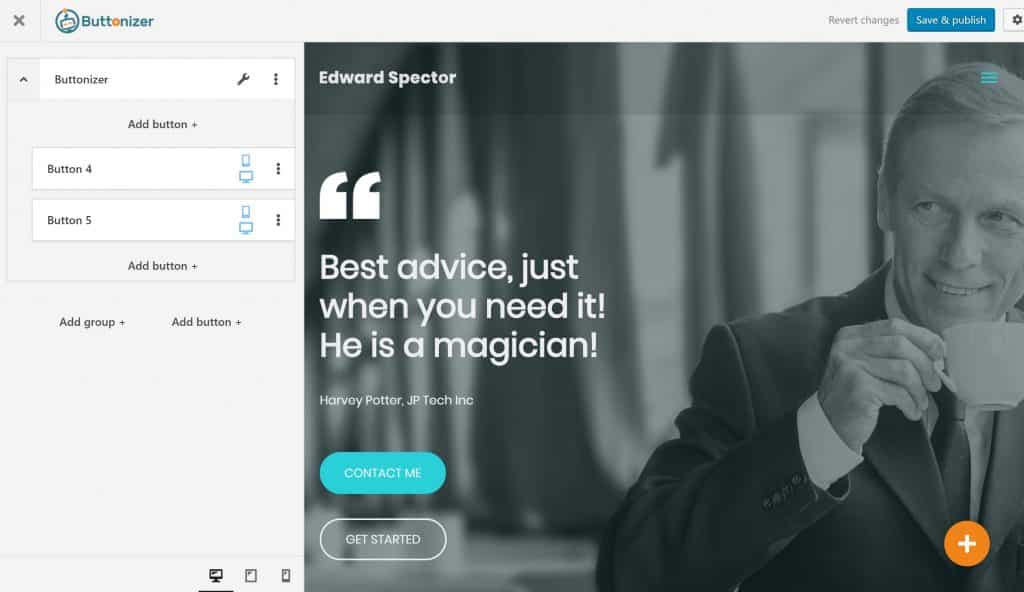
Setting Up Buttons
Buttonizer lets you create two types of content:
- Group – a button group is a collection of two or more buttons, like the example above. A visitor clicks the “main” button group icon and then a list of individual buttons expands.
- Button – this is a single button. When clicked, it performs whatever action you assign to it. You can either create buttons inside of groups or you can create standalone buttons that appear right away (no need for the visitor to click to expand).
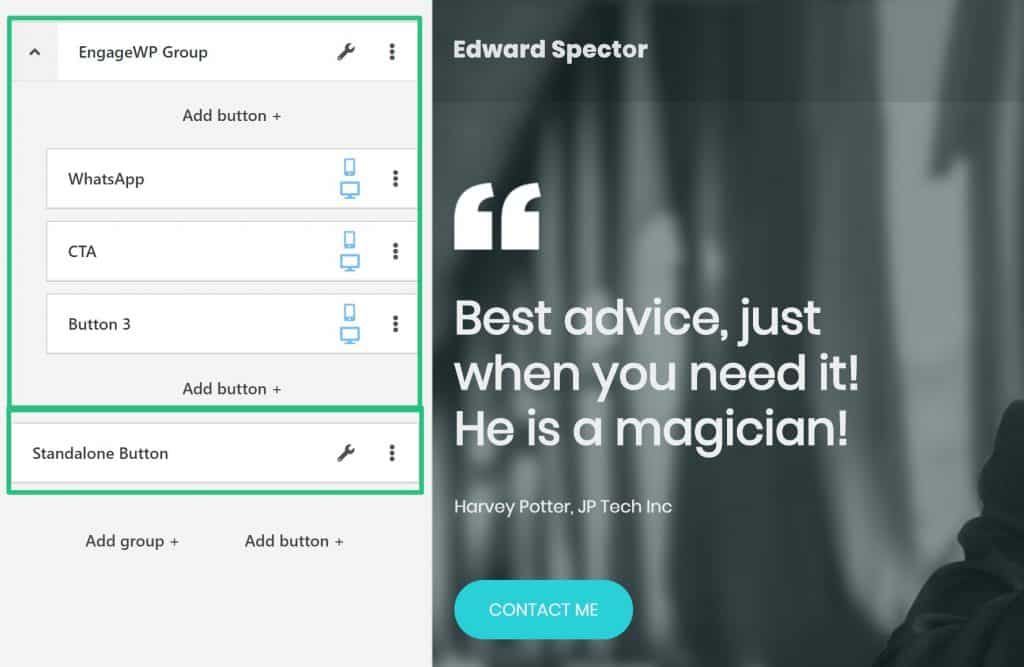
For example, you can see that I’ve created:
- One button group with three individual buttons
- One standalone button
Customizing Individual Buttons
Once you’ve set up the basic button structure, you can click on an individual button to configure it.
The most important choice here is the Button action, which defines what the button’s purpose is. I told you the full list above, but remember that you can have your button:
- Initiate a conversation via phone, email, or live chat.
- Perform an action like visiting a URL or printing the page.
- Share the content on social media.
- Open a popup from a popup plugin.
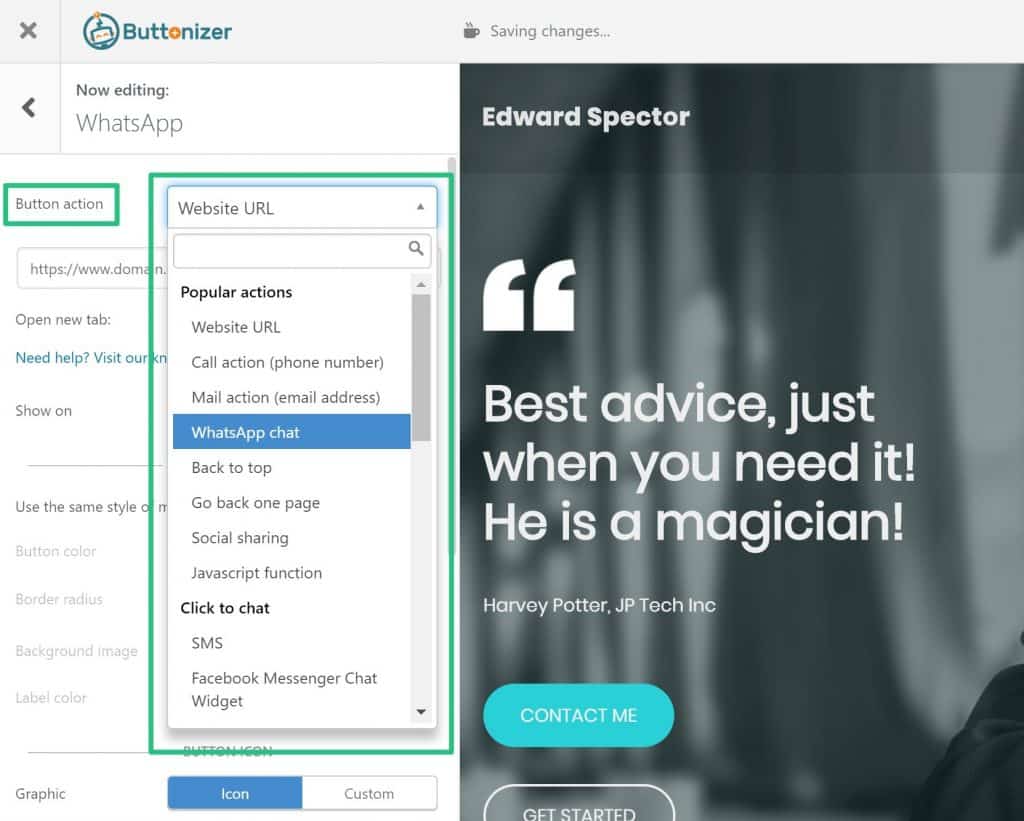
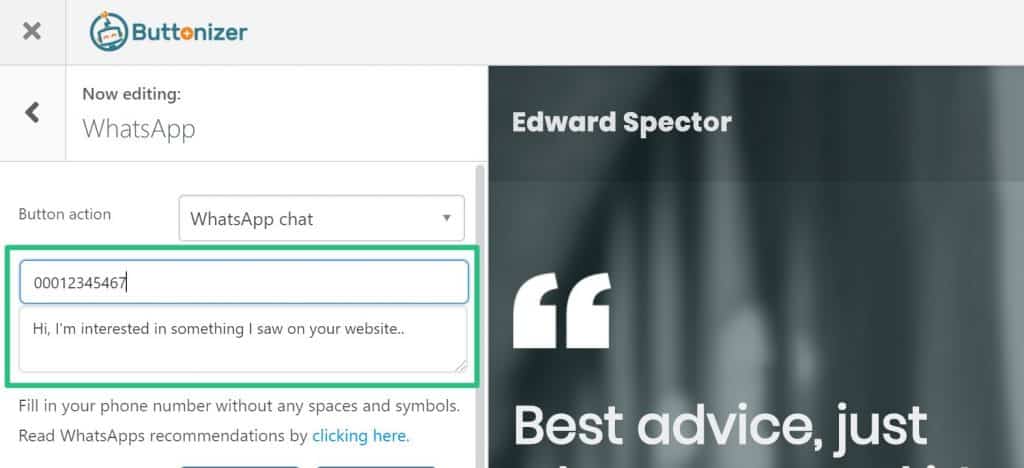
Depending on the action that you choose, you’ll get additional options. For example, if you plan to have a button initiate a WhatsApp chat, you can enter the phone number and default message:
Below that, you can choose which devices to show the button on. This is really helpful because different devices require different buttons.
For example, you might want to add WhatsApp and phone call buttons for mobile visitors, but you don’t want to waste space by showing those buttons to desktop visitors. Similarly, you probably don’t want to show a “print” button to mobile visitors.
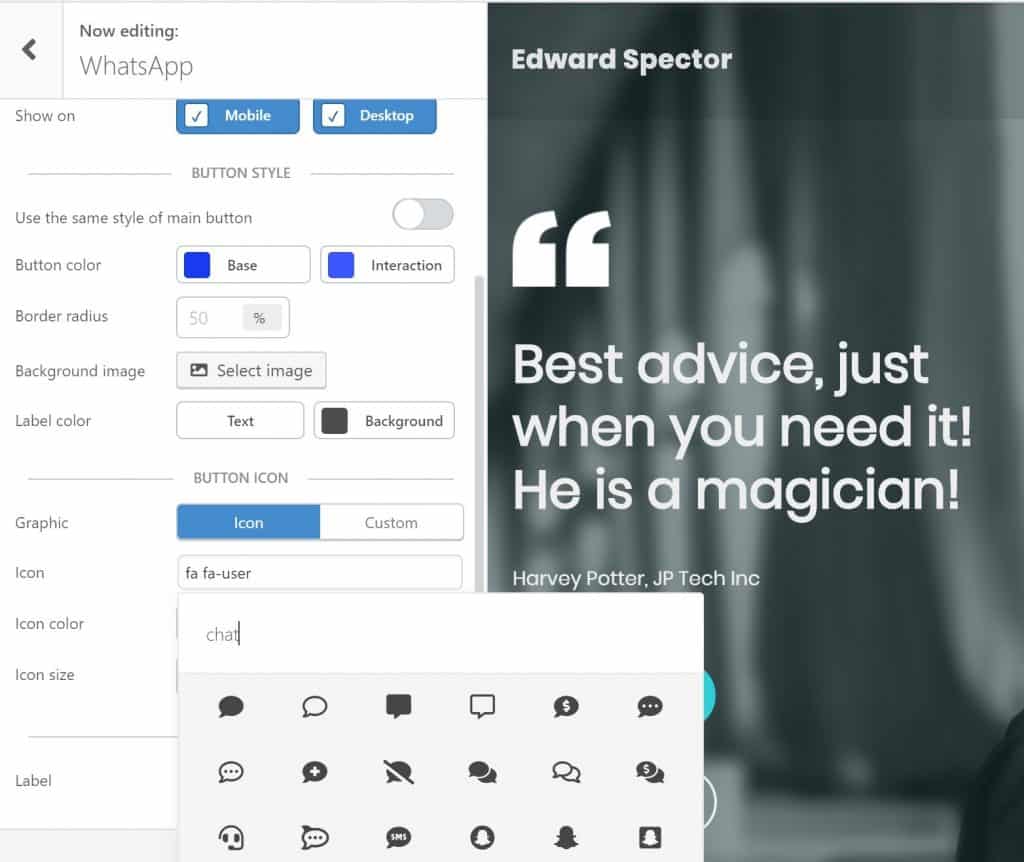
Next up, you can configure styling. You can change up:
- Button color and radius
- Background image
- Label color
- Icon, either by using the built-in Font Awesome icon search or uploading your own icon/image
- Label text, and whether to show that text on different devices
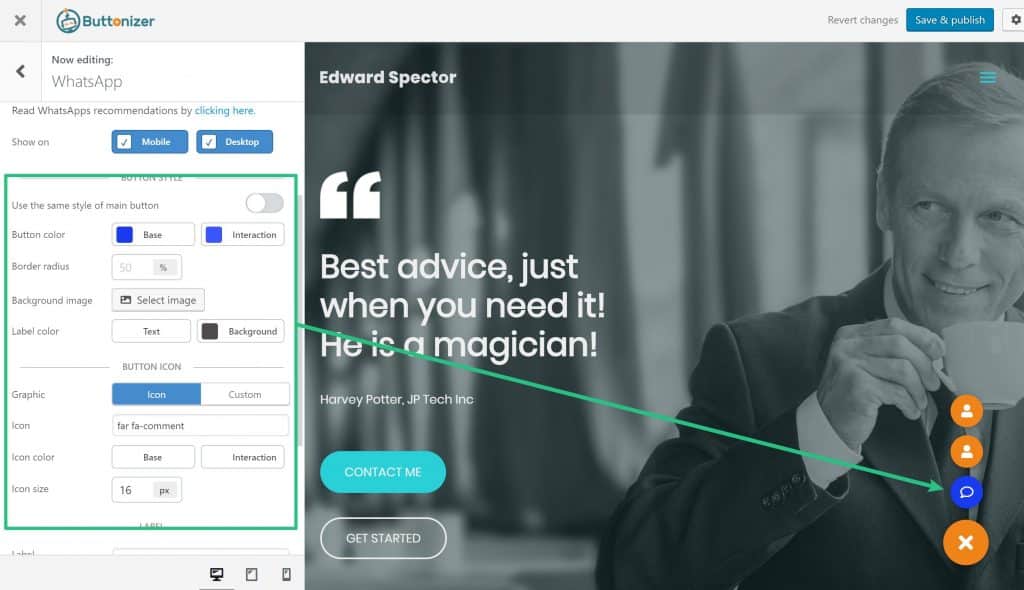
Remember – you have that real-time preview on the right, so you can immediately see how your changes affect your floating action button:
Advanced Settings for Individual Buttons
Finally, you can also open the Advanced Settings, which let you target this button to specific pages or based on time:
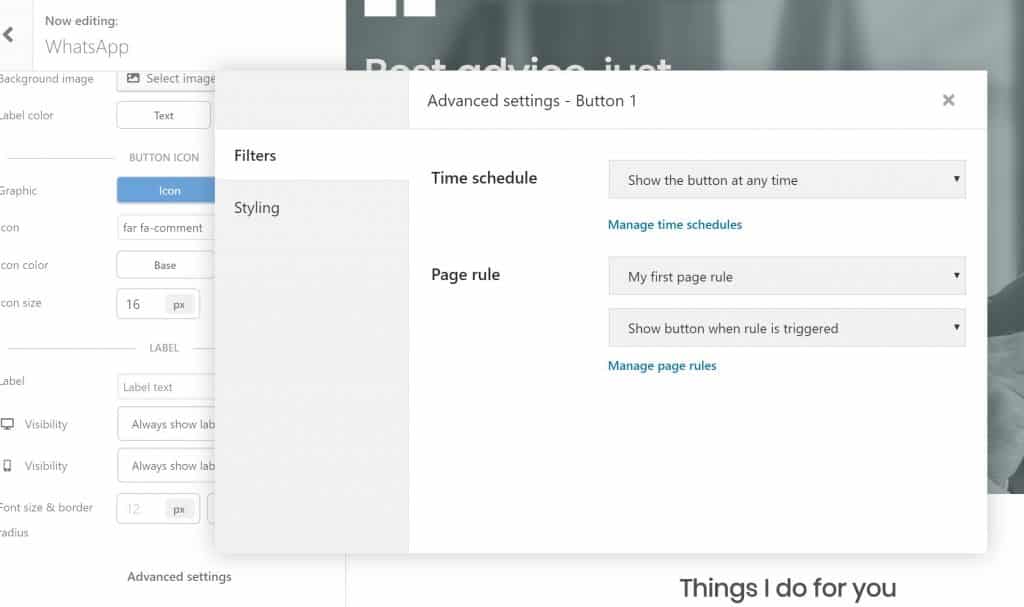
You can create your own detailed time schedules, which is super helpful if your business has set opening hours.
For example, you can display one set of buttons when your store is open and another when it’s closed:
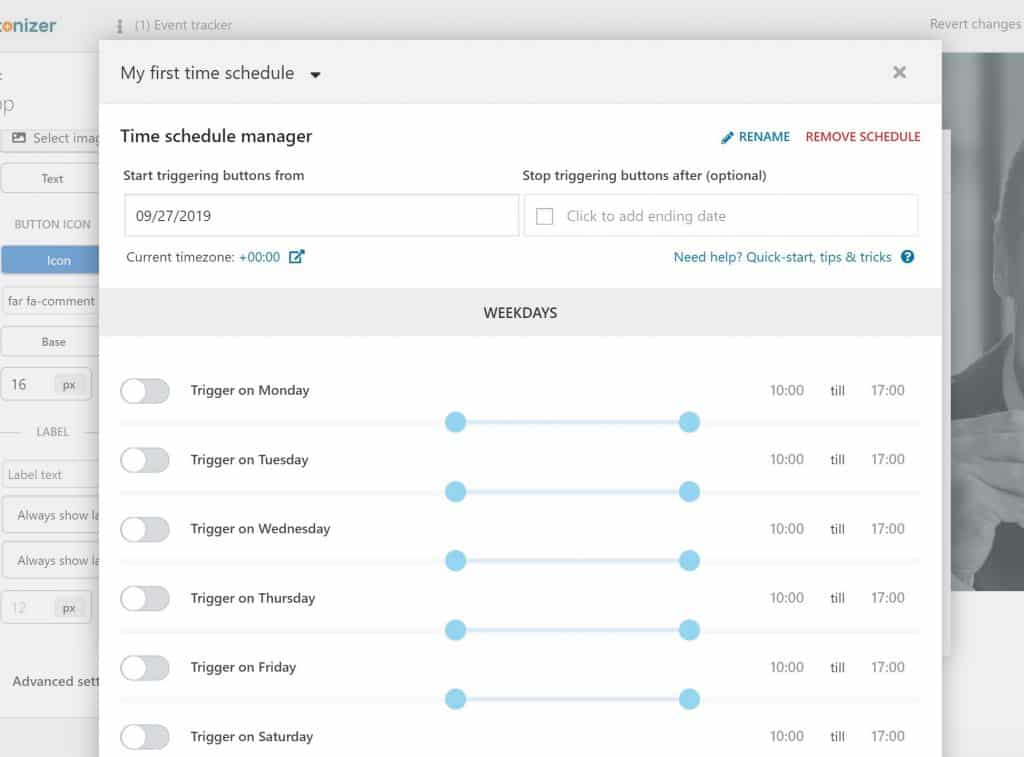
For page-level targeting, you can create detailed page rules, stringing together as many AND/OR conditions as needed.
One really nice addition here is the option to target by user role. For example, if you have a membership site or WooCommerce store, you can target buttons specifically to certain classes of users:
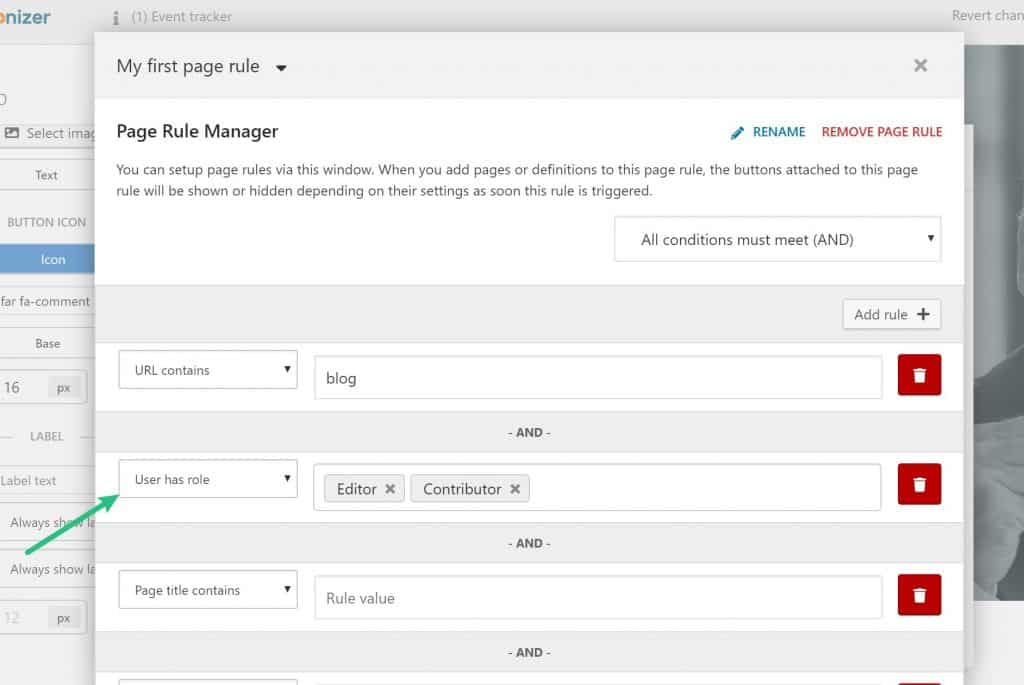
Configuring Button Groups
You get many of the same options at the button group level. For example, you’ll be able to target an entire group of button towards specific devices (as well as individual buttons inside the group). You also get the same styling options.
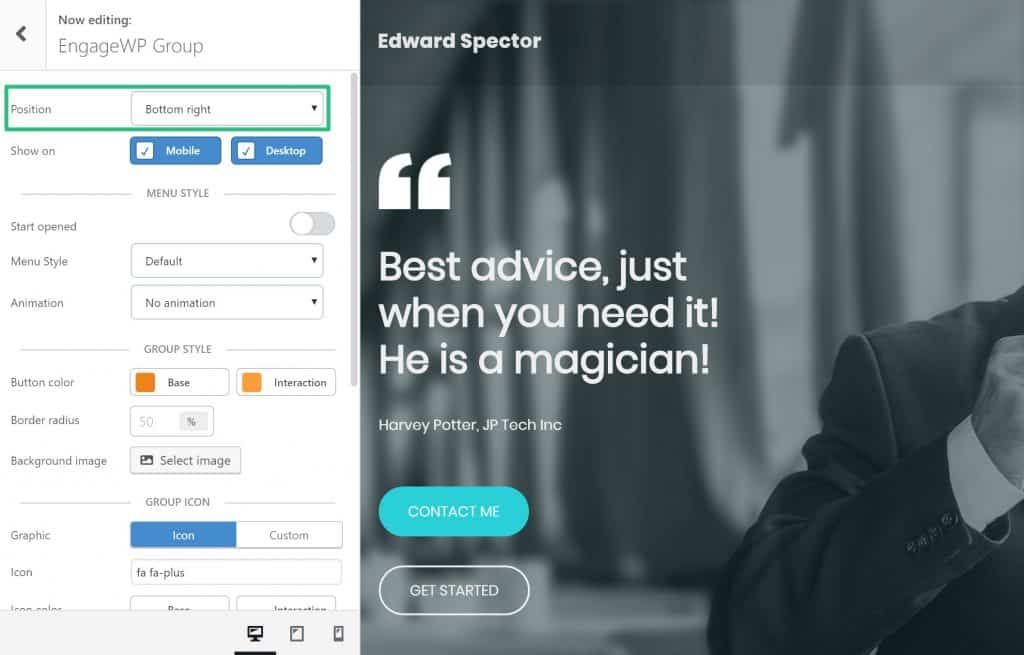
One addition is the ability to change the button group’s position to:
- Bottom right
- Bottom left
- Top right
- Top left
- Custom
In the Advanced Settings for a button group, you’ll get the same ability to assign time schedules and page rules. But you also get a new Timeout & Scroll option. This is where you can assign triggers for when your group should display.
By default, it loads immediately and is always visible, but you can also wait to load it based on…
- Time on site
- Scroll depth
- Exit intent
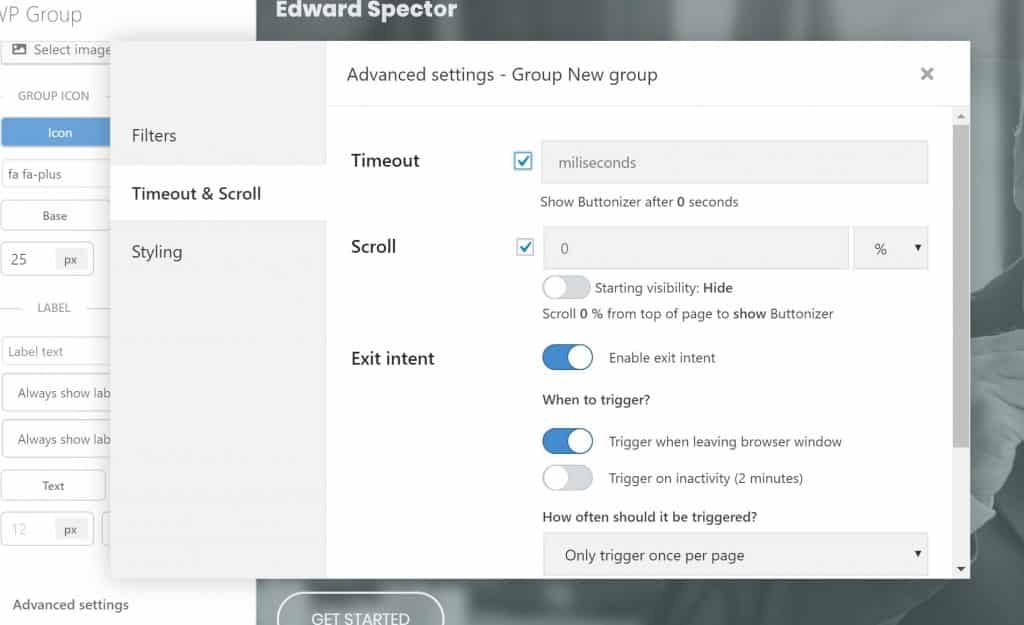
If you have a single button outside a button group, you’ll also get these options.
Buttonizer Pricing Information
Buttonizer has a limited free version at WordPress.org that is a great way to get acquainted with the plugin. You can use most of the button types, but you’ll miss out on advanced features like page/time targeting, trigger rules, and some other features.
If you decide you want to grow Pro, Buttonizer offers plans that give you one year of support/updates or plans that give you lifetime support and updates:

Buttonizer Coupon Code
Readers of EngageWP can benefit from an exclusive promotion: you will get a 30% discount on the Annual Plan (except for the unlimited plan), if you use the following coupon code: BUZZYENGAGEWPREADER
Final Thoughts and Pricing
Buttonizer is a really versatile plugin that you can use in a ton of different ways.
If you have a business, you can use Buttonizer to help visitors get in contact with you via phone, live chat, or email. And even if you just have a blog, you can still use Buttonizer to drive shares, promote your content, and more.
It’s a targeted use case – it literally only does floating action buttons. But if a floating action button is what you want, Buttonizer is the most flexible, comprehensive tool that I’ve come across.
Leave a Reply