Manual WordPress Installation
In the last tutorial, I covered installing WordPress automatically in cPanel using Fantastico De Luxe. This tutorial will cover manual WordPress installations. A manual installation is more complex and typically not necessary but if your hosting provider does not provide any automatic WordPress installation, you will need to go the manual route. The most popular hosting providers, such as HostGator and WP Engine, offer automatic installations but knowing how to install WP manually is always helpful.
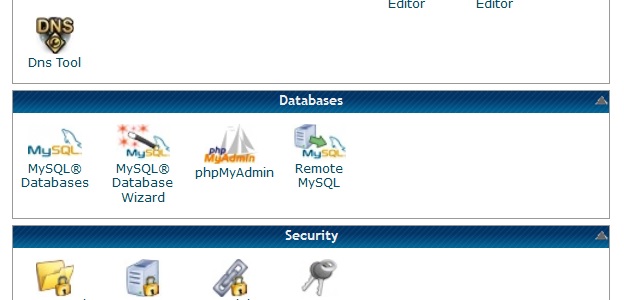
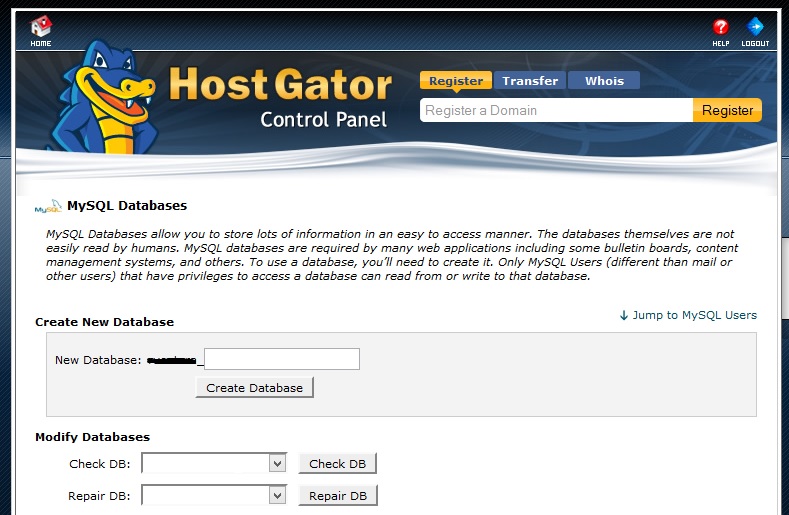
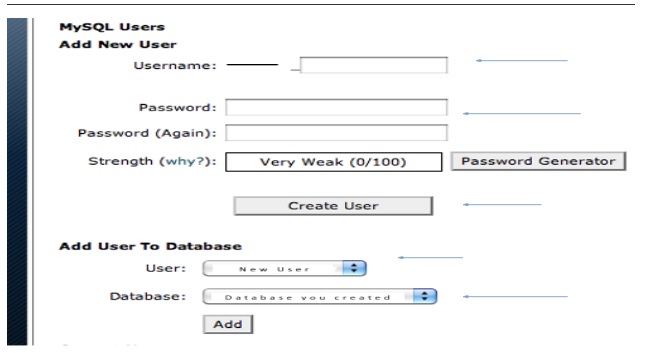
The first thing we need to do is create a database to store important information from our WordPress installation. Our files will be stored in a directory (folder) on our server but things like settings and posts need to be stored in a MySQL database. This is what was done automatically with Fantastico De Luxe in the previous tutorial. To do this manually, you need to be logged in to your hosting account’s cPanel. Once there, find the “Databases” panel and click on “MySQL® Databases” (NOT the Wizard). You’ll see the “Create New Database” section. Name your database whatever you’d like and click “Create Database”. Next, you will create a new user and assign that user to the database. Add a new username & password and click Create User. Then select this new user from the dropdown menu and assign it to the correct database.
Okay. We now have our database setup. Here are the next steps:
- Download the WordPress installation files from http://wordpress.org
- Unzip and save the folder to a convenient location. I recommend saving it to your Desktop.
- Download a File Transfer Protocol client. I highly recommend FileZilla and will be using for this tutorial. Download at http://filezilla-project.org/. FTP is used for transferring files remotely from your computer to a live server.
- OPTIONAL: Download a code editor. Notepad ++ for Windows is my top choice or Text Wrangler for Mac. Both are free and make code writing/editing much easier than a simple text editor.
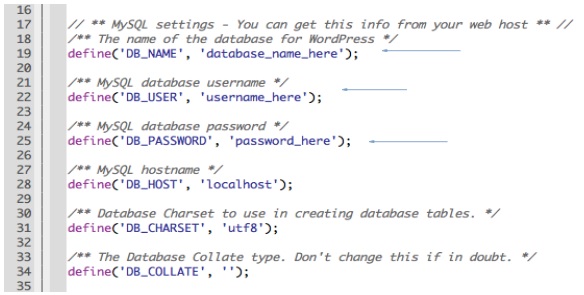
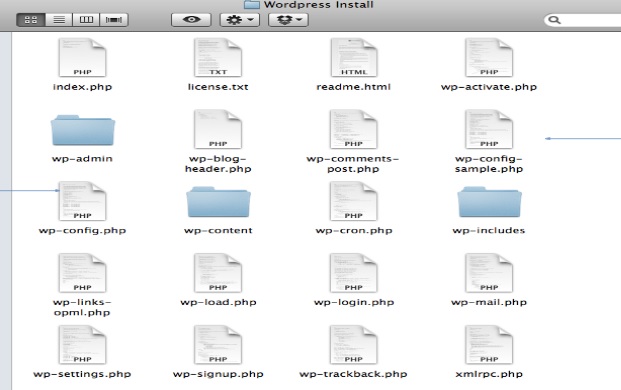
- Open your WordPress installation folder that you saved to your desktop (hopefully!). In it will be a file called “wp-config-sample.php”. Right click on this file and choose to open it with your text editor (or code editor if you downloaded one). Now, we have to change some code. The information we need to change is regarding the database we created. This process is telling our WordPress configuration to connect to our new database. You will need to change the ‘DB_NAME’, ‘DB_USER’ and ‘DB_PASSWORD’ areas. Enter the name of your database, the full username of the user you created, and the username password. Make sure everything is within the single quotation marks. Leave everything else as is.
- Next, you need to save this file. This is important! Click File → Save As. IMPORTANT PART: rename the file “wp-config.php” and make sure it is saved to the root WP install file (i.e. don’t change the location). You’re just deleting the “-sample” part. To verify you did this correctly, go into the root folder and you should see your newly saved wp-config and the wp-config-sample PHP files. You need to DELETE the wp-config-sample.php file. You can also save over the wp-confi-sample.php and rename it after saving.
- Retrieve your hosting username, password and Host name/IP. All of this information should be in your welcome email from the hosting company (HostGator in this case). If not, contact the host and get the info from them.
- Connect to your website’s directory. To do this, launch FileZilla and use the “Quickconnect” at the top of the FileZilla window. The program will now connect to your host and access the files on it. You can enter your server IP in the Host area.
- Locate the “public_html” folder and the root directory for your website. Its path will be: /public_html/yourdomain. If you can’t find the public_html directory, click the “Remote site” search bar and type in your website’s path, excluding the .com, .net, or whatever your TLD. Now go into your site’s directory. There will only be a few (at most) basic files in there.
- On the “local” side of the FileZilla window, navigate to your WP root folder (another reason why it’s easiest to save to your desktop). Once you’ve located the folder, double click to enter it. We need to upload the CONTENTS of this folder, not including the folder itself. Single click on the first file inside the root folder to highlight it (it’s a folder named “wp-admin”). Now navigate down the bottom of the list. Hold down your Shift key and single click this last file. Now you’ve selected the first and last files and everything in between (a little keyboard shortcut). Now stop and let’s make sure everything is ready to be uploaded CORRECTLY…
On the local panel, you have just selected the files you need to upload so we should be clear on that front. On the remote side, verify that you’re still inside your public_html/yourdomain. If both are correct, we can now upload the files. Right click on the local WP install files and select “Upload”. The uploading process will take a few minutes.
Finishing Up
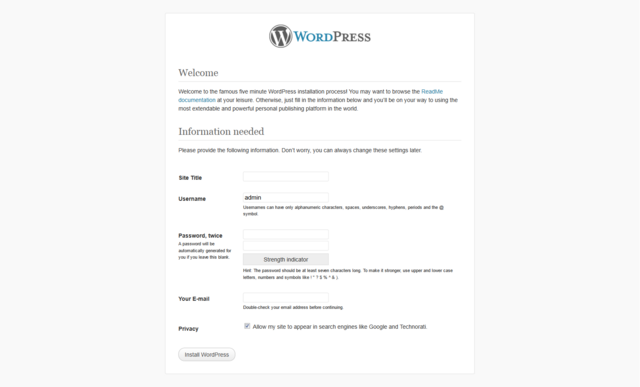
Once you’ve created your database, uploaded your files, and connected your WordPress installation to your database, you can visit http://yoursite.com/wp-admin. This will take you to page where you’ll complete the setup of your installation by creating admin login information. From there, you can sign in and begin.
Leave a Reply